
SO!
Have you mastered the paper-piecing and assembled ALL(maybe many of) the arcs?
It isn't so bad once you get the hang of it - RIGHT??
The hardest part is DONE!
NOW -
attaching the inner curved piece and outer curved piece to the paper-pieced section is all the piecing work left to do.
attaching the inner curved piece and outer curved piece to the paper-pieced section is all the piecing work left to do.
Sewing curved pieces is not difficult - it just requires a little patience and prep work.
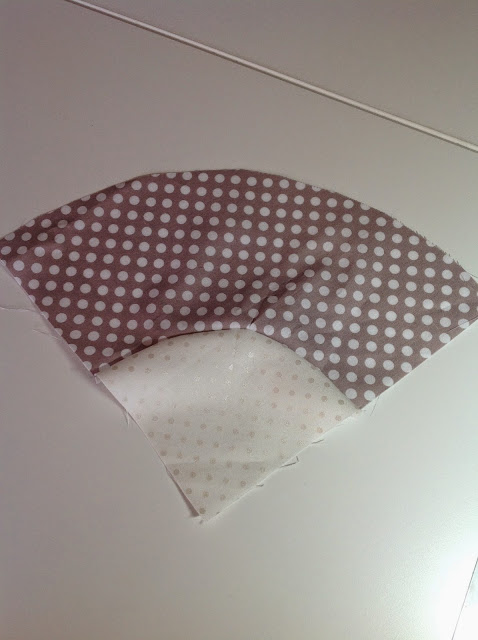
Copy the pattern for sections A & C onto freezer paper and cut out the shapes (the grey fabric with white polka dots represents the arcs you have just finished with the paper-pieced rays). I am only showing sections B and C.
Copy the pattern for sections A & C onto freezer paper and cut out the shapes (the grey fabric with white polka dots represents the arcs you have just finished with the paper-pieced rays). I am only showing sections B and C.

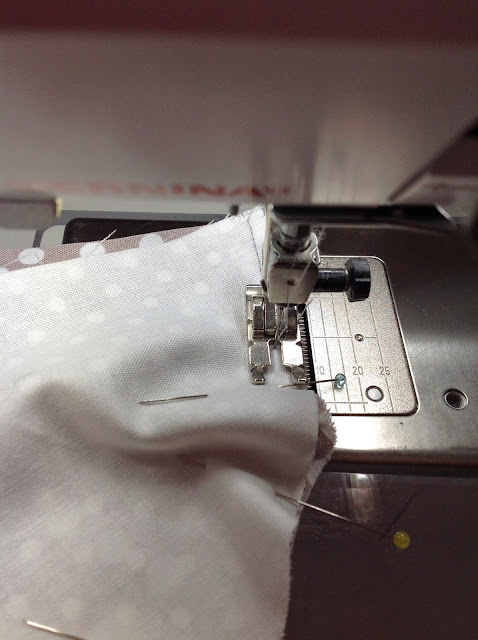
I find the most accurate method is to pin in the center of the 2 curves first,
then the outermost points,
then, depending on how big the curve is - pin at the half-way point between the 2 pins at the outer edge and the mid-point and either leave it be or keep pinning at midpoints, if necessary and as needed.
Fold the section right sides together to find the midpoint of each on the stitching line.


Oriented as in the block after pressing:

Wrong side:


Fold the section right sides together to find the midpoint of each on the stitching line.


Right sides together match section C at the midpoint to the midpoint of section B.
Pin at the outer edge.
Wow - will this really sew together and lie flat??
YES IT WILL!

BUT it is going to look much worse....


Slowly stitch from edge to edge, easing as you go. Be very careful NOT to stretch this bias edge as you proceed.

If all goes well - it will look something like this:

Opened up before pressing:


Wrong side:

SO! It worked! Not too difficult. Now do the same attaching section A to this combined Section B&C.
This was probably a little easier using a single piece of fabric rather than the pieced arc section B you have with all the rays. When piecing paper-pieced sections often you are told to leave the paper on while assembling everything. Personally, with this pattern I felt like had much more flexibilty in piecing with the paper removed. Try it both ways and see what works best for you.
This does bring us to the end of the piecing for this particular quilt. The remaining blocks are simple squares.
Lay out the entire pattern on a design wall then stitch the individual blocks in the rows together, then the rows to each other.
THIS, or something similar, is what you have created!
I am sure you noticed it is very easy to alter the pattern by moving the different blocks around to your liking.

PLEASE SHARE IF YOU FINISH A PINK SUN RISING QUIT TOP!!
WE WOULD ALL LOVE TO SEE IT.
A lovely quilt for boy or girl....:)
ReplyDeleteThanks!
ReplyDelete